
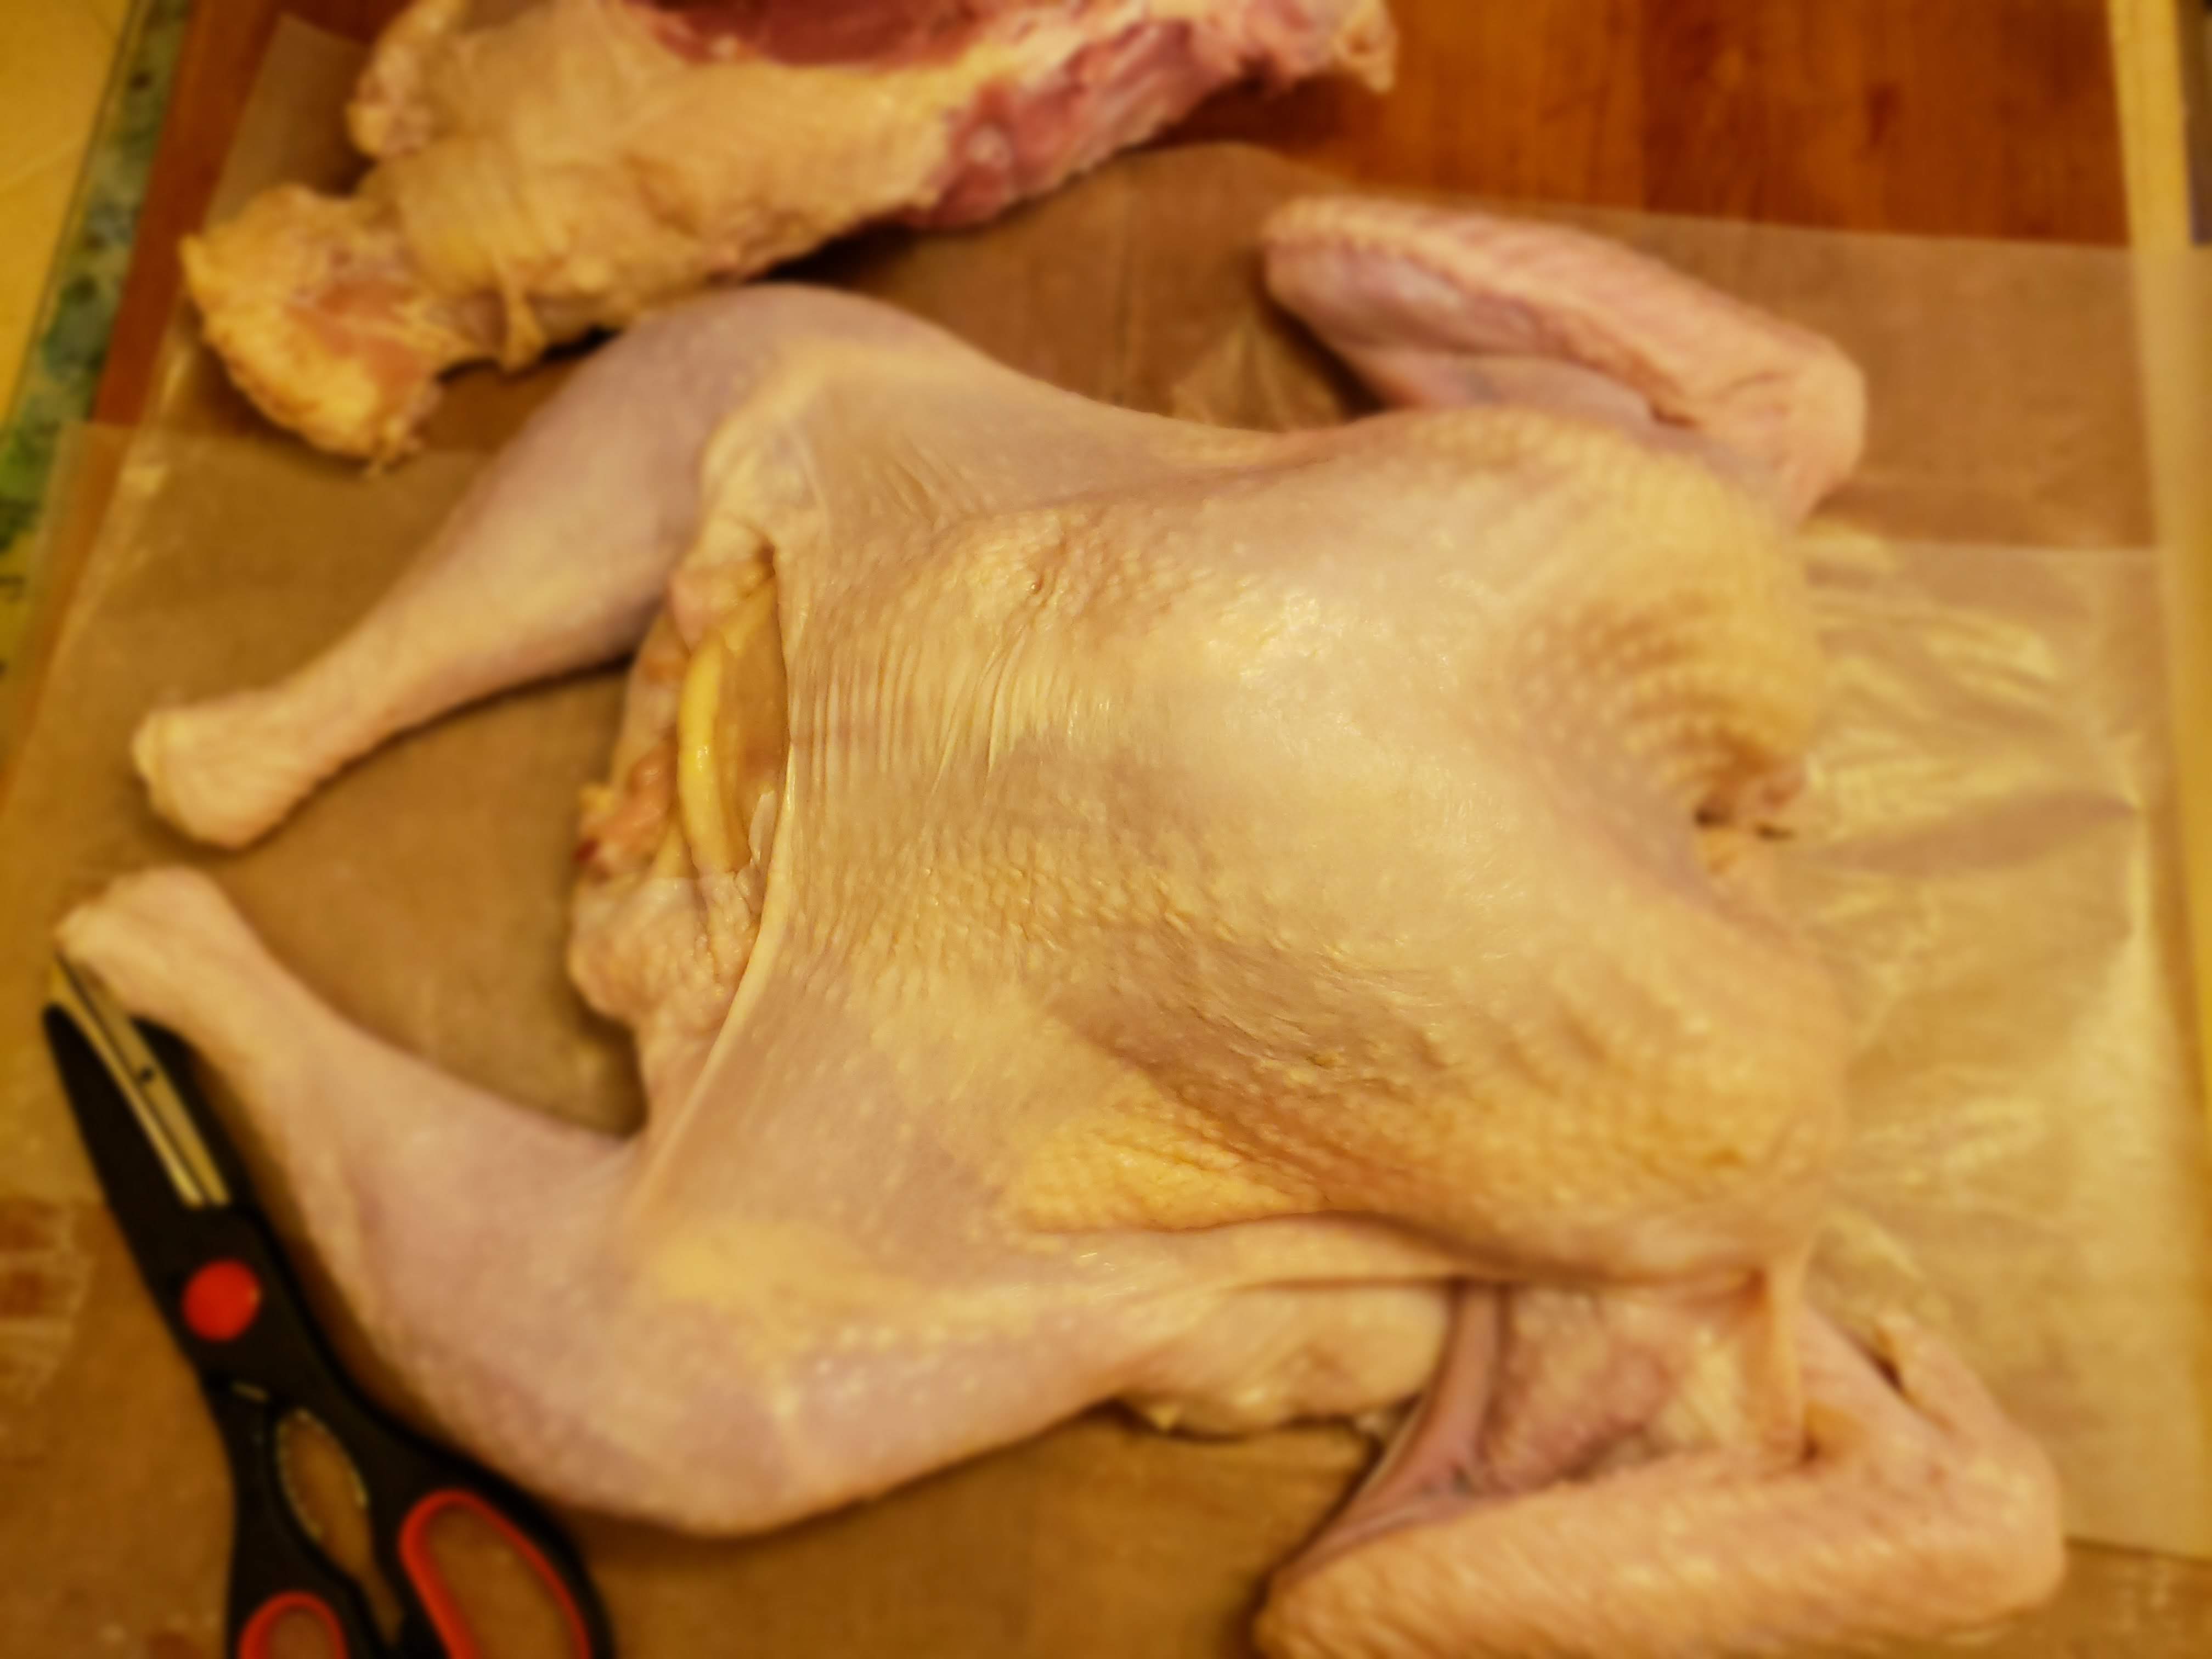
A spatchcocked, 12-pound turkey with backbone removed.
Spatchcock.
What an odd word. If you didn’t know what it meant, your imagination would lace up and take off running. Before that happens let me break it down for you.
What is it?
Spatchcock: a method of preparing poultry for cooking. The method involves removing the backbone from tail to neck so that the bird can be opened out flat (also referred to as butterflying). When oven roasting a bird, this method results in a shorter cooking time.
Butterflying – that’s essentially what spatchcock means. With the backbone removed and the bird pressed out flat, it creates the perfect condition to roast a bird that cooks more evenly and allows the breast to cook in about the same time as the leg and thigh.
It’s a technique that is widely used in preparing chicken and is said to date back to the 18th century. The results have been quite succulent. If you are not a fan of breast meat because it tends to be dry, this process might change your mind.
My Thanksgiving mission
Every Thanksgiving I look for a way to zhuzh up my turkey game. Building a better bird is a perpetual pilgrimage for me and I would dare say for many Thanksgiving turkey preparers. No one wants a dry bird. Moisture is queen. The spatchcock method seems to be king in making a more moist and succulent bird. I’ve tried the technique for chicken with excellent results. This year I tired the technique on my Thanksgiving bird. The results? An amazingly moist and flavorful turkey.
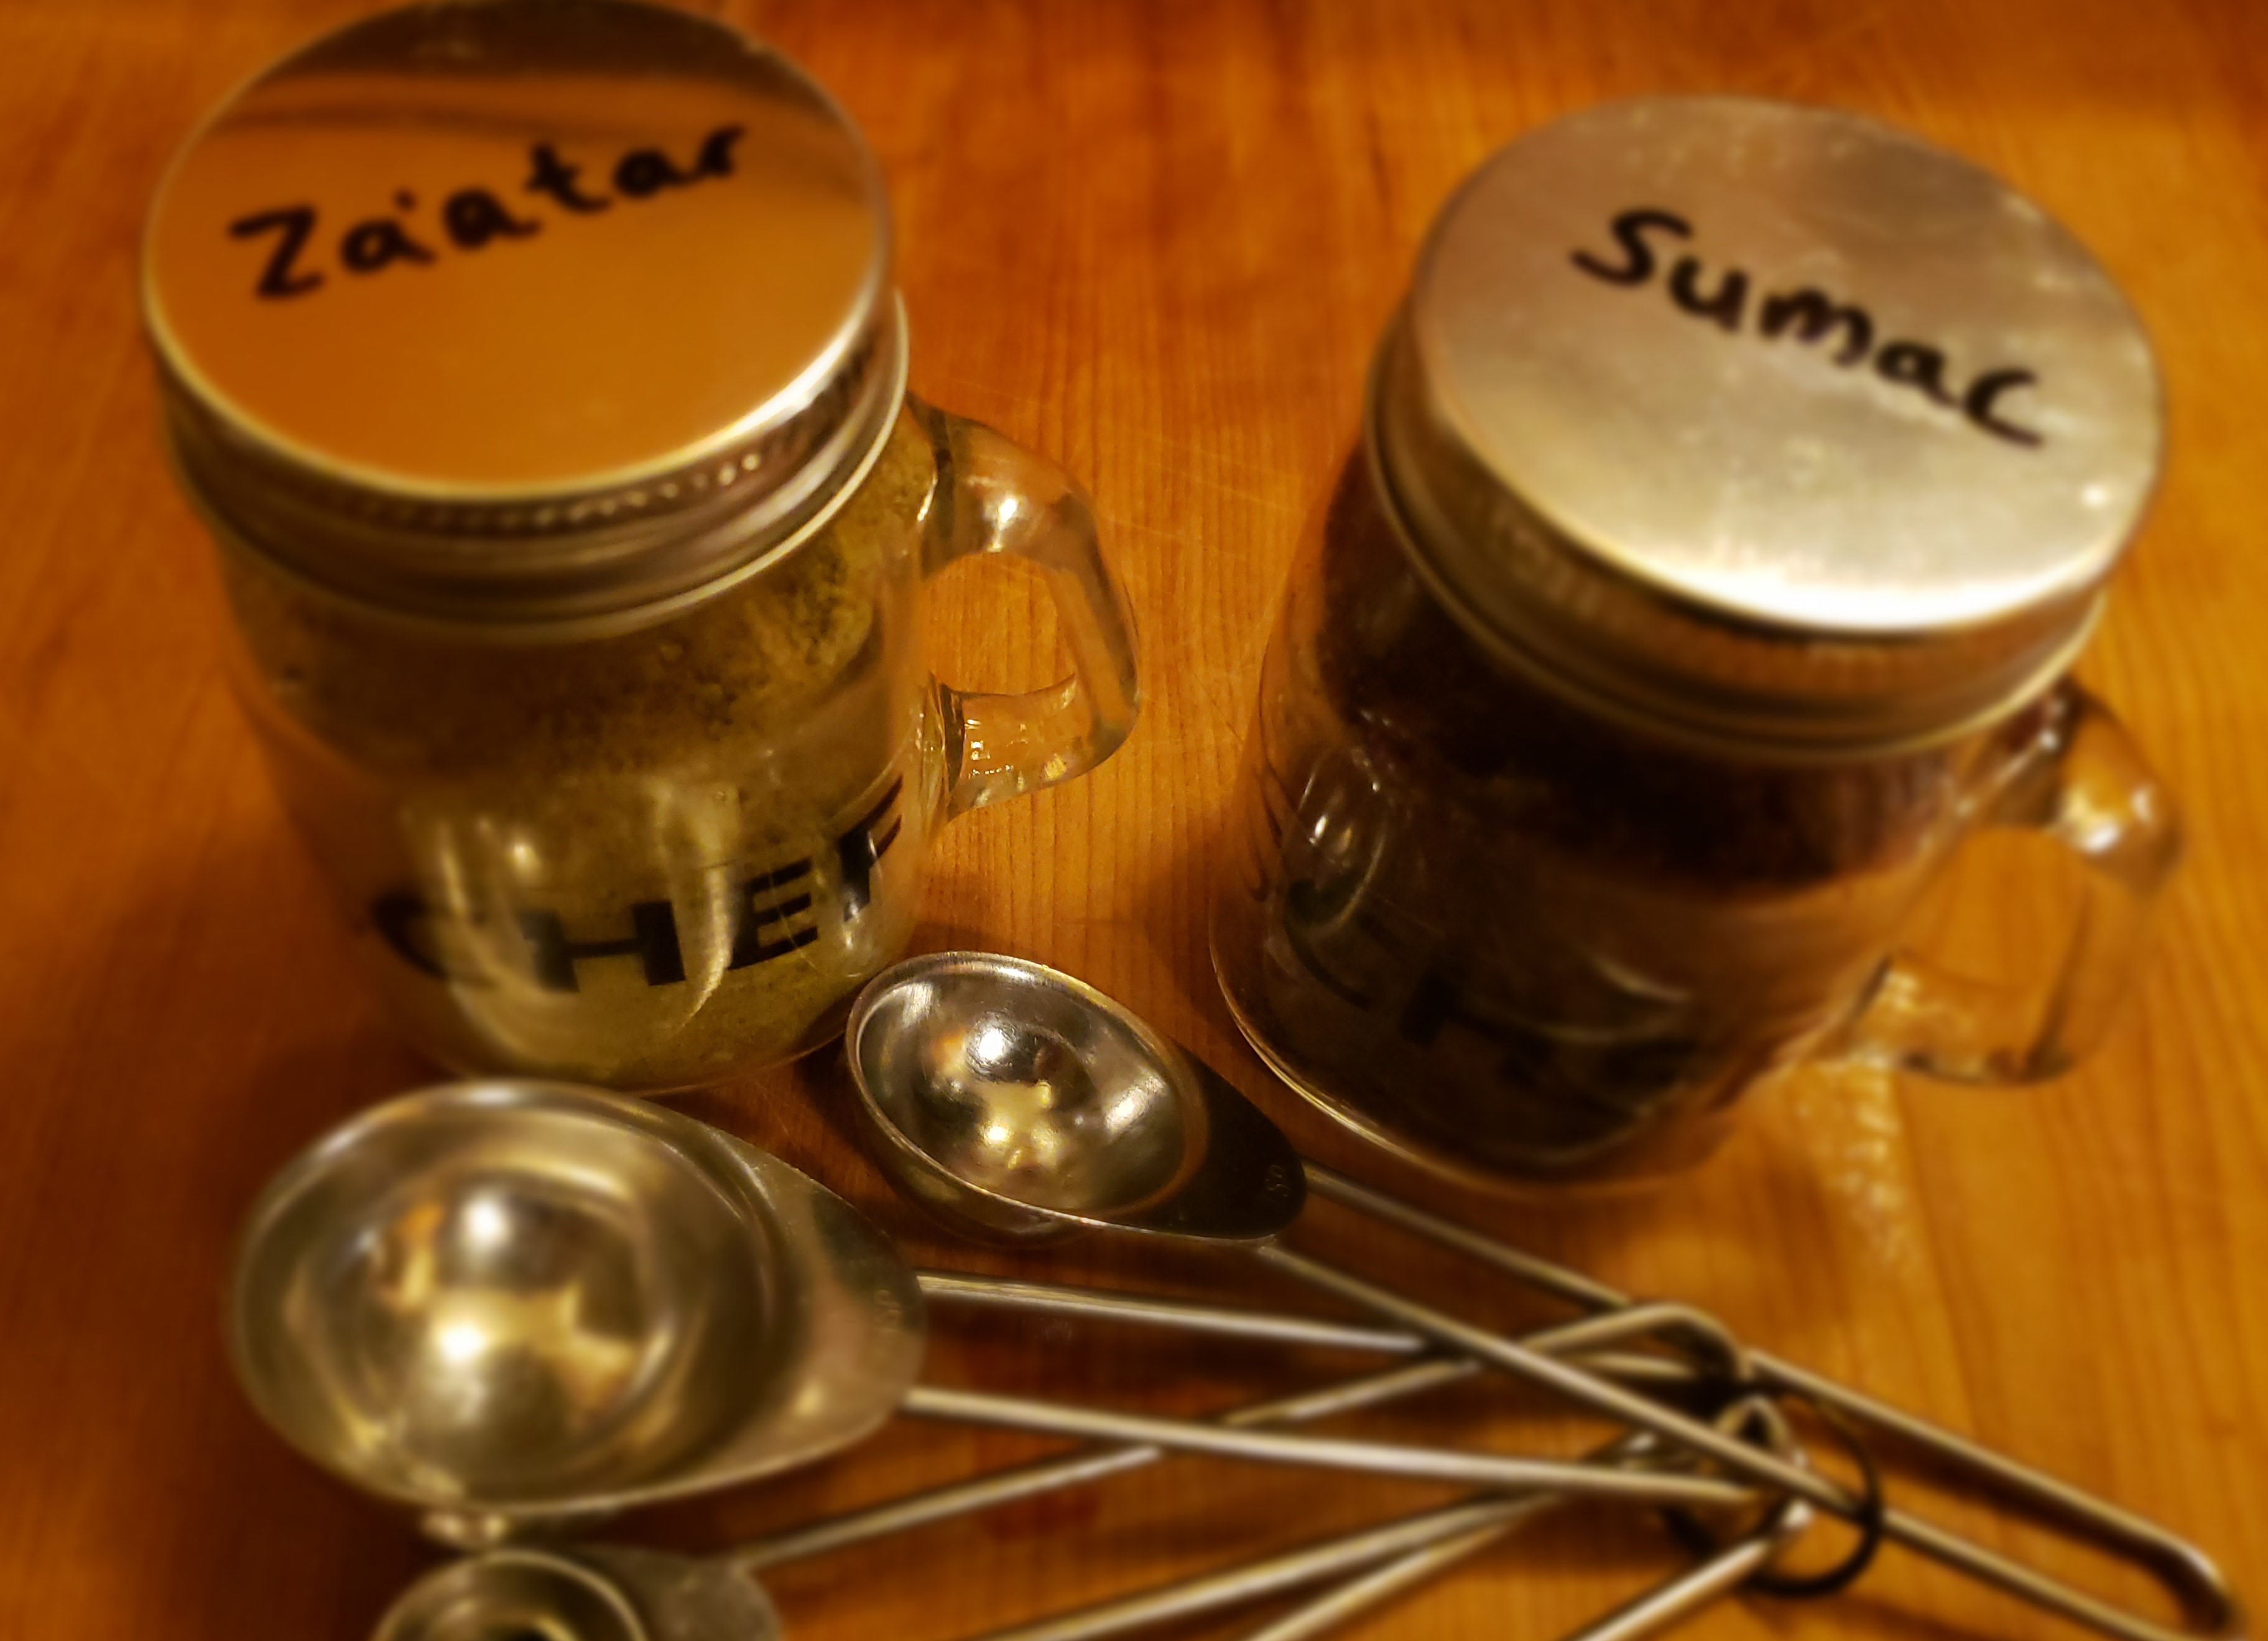
Za’atar and Sumac gifted to me by the folks at Yes Chef
A bit of umami
I upped the flavor of my bird by using an herb butter I made with fresh chopped flat leaf parsley, chopped garlic, fresh orange zest and ground Za’atar spice from the folks at Yes Chef. Za’atar is a Middle Eastern spice blend that includes ingredients such as ground dried thyme, oregano, marjoram, toasted sesame seeds, sumac, cumin and coriander. It is so aromatic and reminiscent of many of the spices I use during Thanksgiving, I decided to give it a go. And the simple addition of orange zest to the herb butter was just the umami twist I was looking for. By the way, you can find Za’atar at most markets and organic food stores. Thanks Chef Nancy Silverton for the inspiration!
My notes
Should you spatchcock your Thanksgiving turkey? As one home cook to another, you should totally go for it. Here are a few notes from my experience:
- My bird was just over 12-pounds and was about the maximum size my small, built-in oven could handle.
- Spatchcocking requires the turkey to be on a surface large enough in dimensions to contain the entire bird. I didn’t have a roasting pan large enough. Instead I used a large baking sheet I covered with 18-inch wide heavy duty foil that was long enough to fold up the edges around the bird to create a little cooking container.
- Spatchcocking is said to reduce the cooking time. My 12-pound foil covered turkey took two hours to roast in an oven set at 375 degrees Fahrenheit. The final minutes of cooking I removed the foil tent to allow it to brown.
- No matter how long it takes to roast, when the turkey breast meat reaches a temperature of 155 to 160 degrees Fahrenheit, remove it from the oven and cover with foil and it will continue to cook outside the oven. Don’t rely on the pop up thermometer that may come with your bird. Relying on that as an indicator will result in a bird that is overcooked. Invest in a food thermometer for best results. I purchased mine from my local market in the food gadget section.
Now, go forth and spatchcock that bird!
Spatchcock Turkey

Spatchcock turkey cut, sliced, plated and ready to serve.
Ingredients
For turkey
1 12-pound turkey (fresh, natural turkey used here)
Sea salt
Garlic powder
Ground pepper
For herb butter
1 stick unsalted butter, softened
2 tablespoons fresh chopped flat leaf parsley
2 teaspoons Za’atar spice (I put the spice in a coffee grinder to blend the sesame seeds)
¼ teaspoon salt
1 clove finely chopped garlic
Zest from one large orange
Directions
Herb butter
- In a medium bowl, add butter, chopped parsley, Za’atar spice, salt, finely chopped garlic, and zest from one large orange.
- Blend with a fork to thoroughly incorporate all ingredients. Set aside.
Turkey Preparation
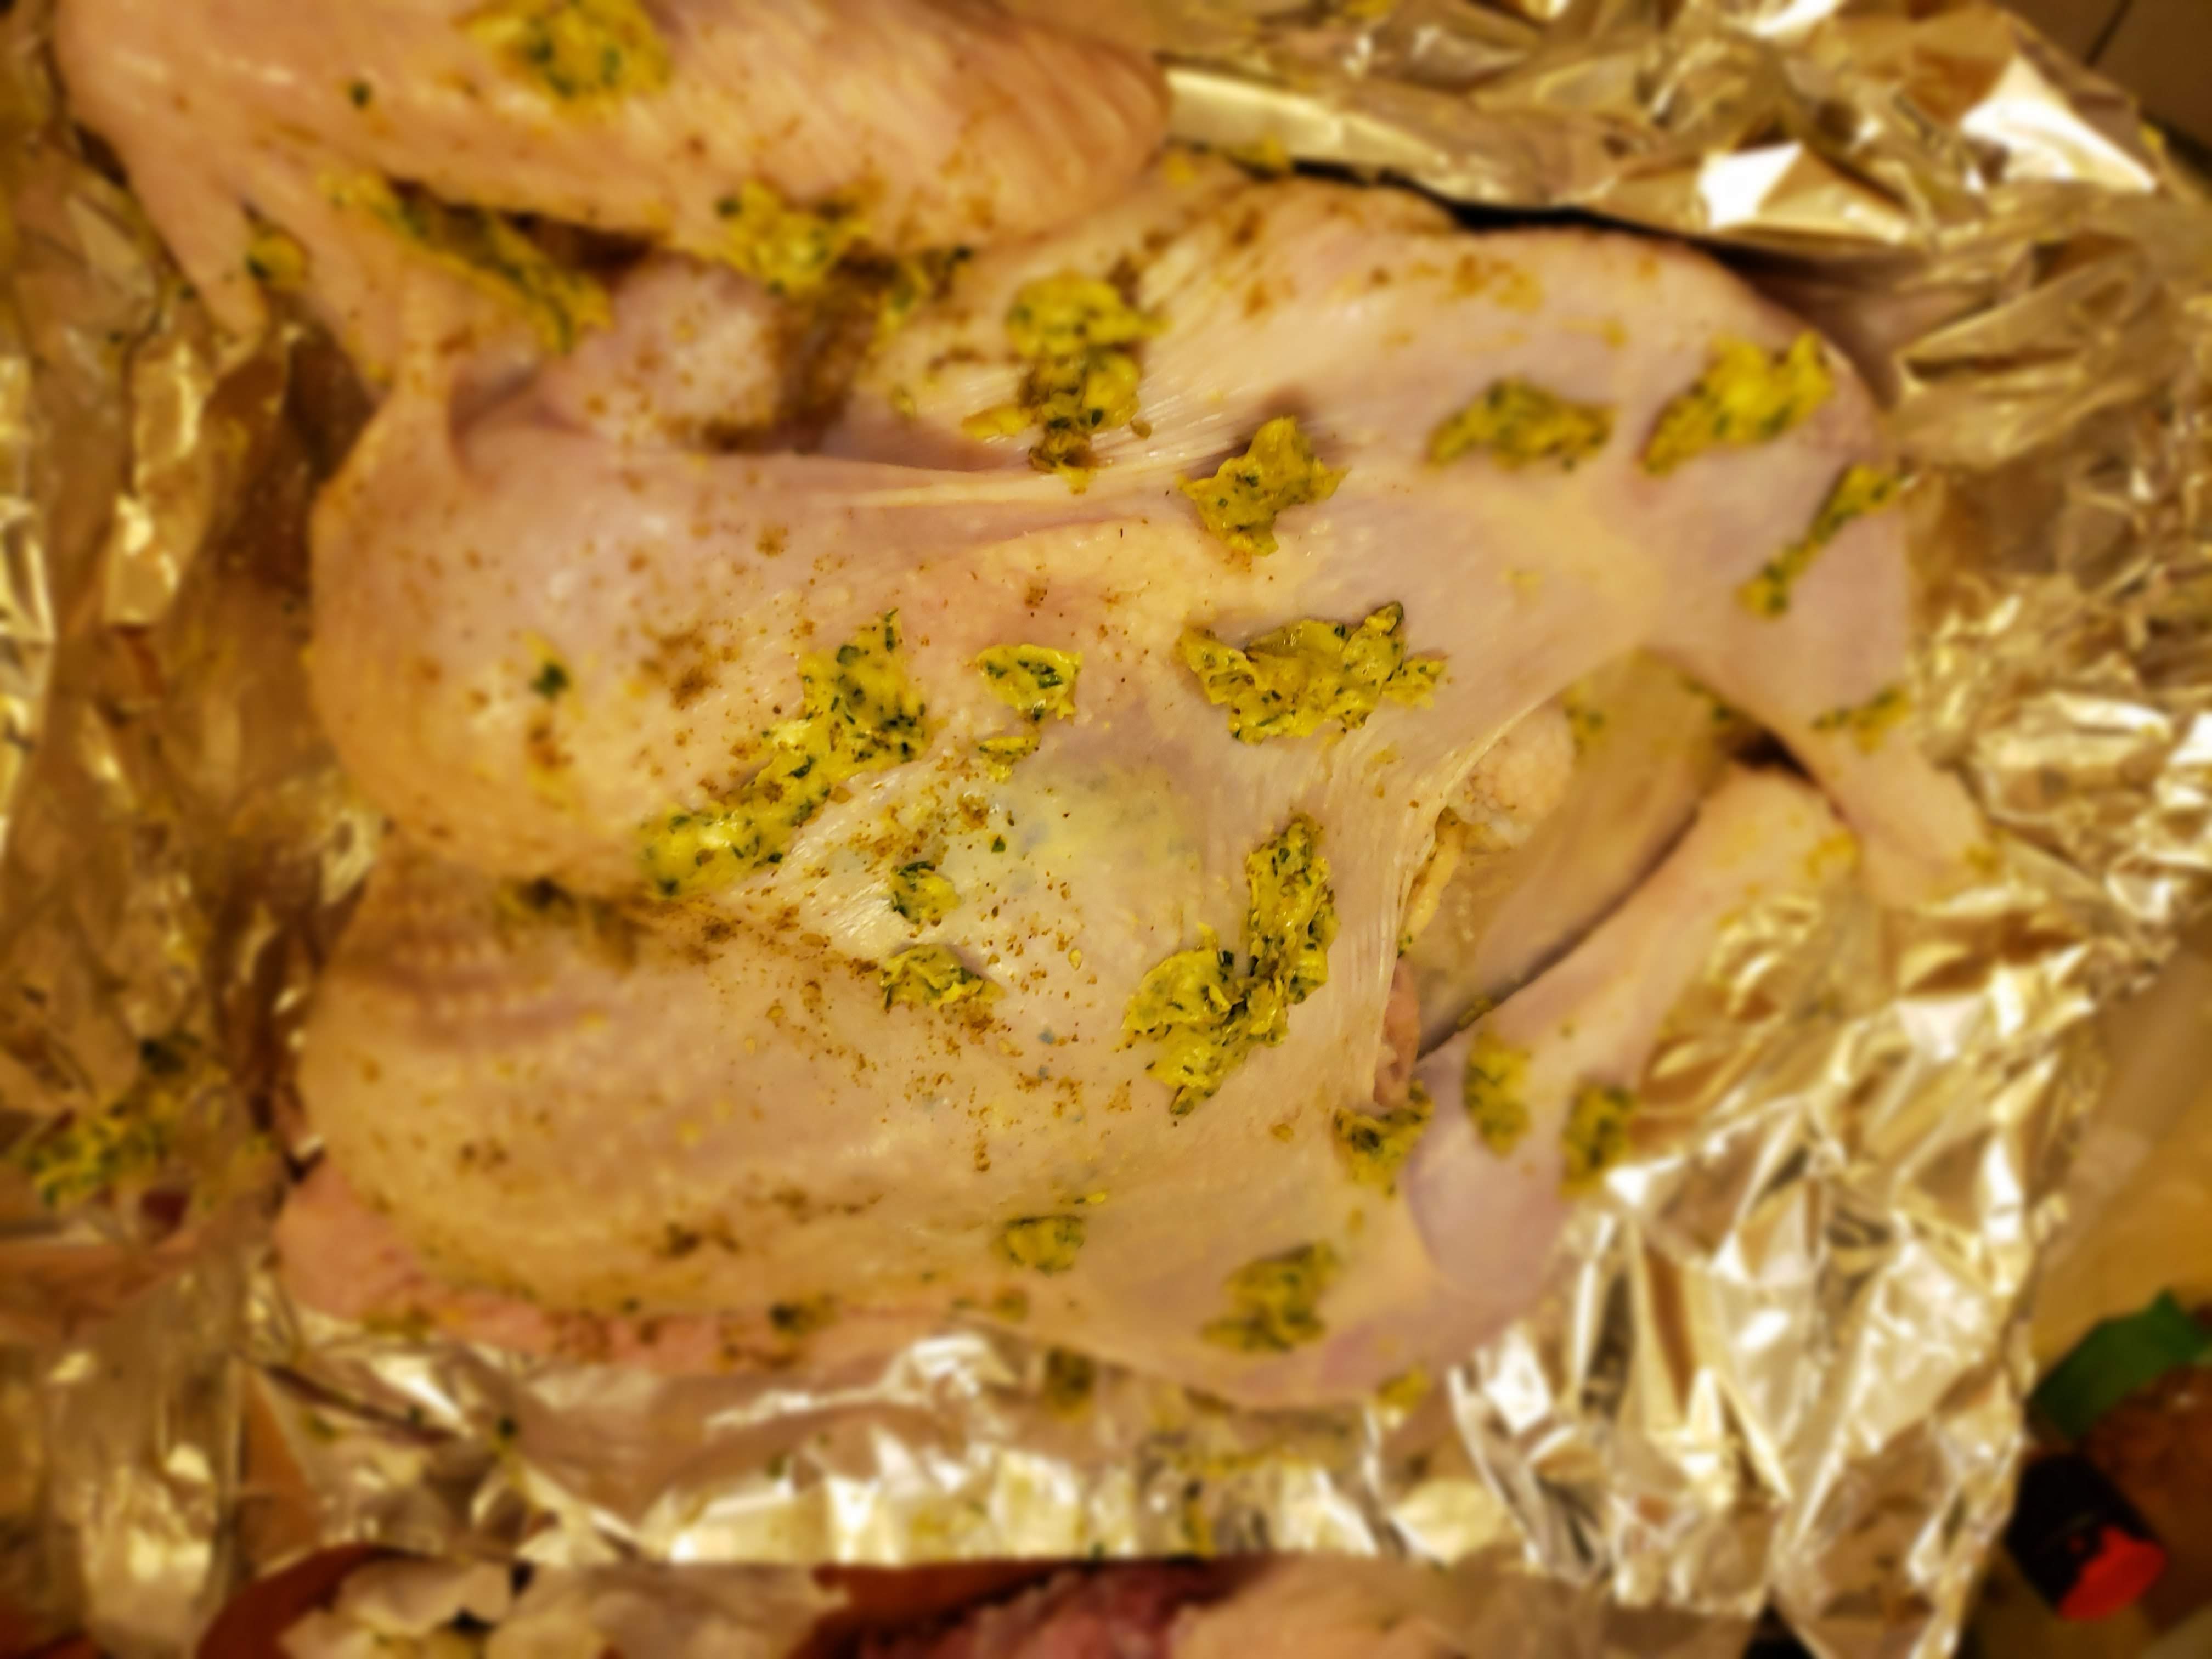
Spatchcock turkey with herbed butter, in foil ready for the oven. Note how foil is folded up along the edges to form a cooking container.
- Preheat oven to 375 degrees Fahrenheit. Remove the neck and giblets from the turkey. You can reserve for soup or gravy.
- Place the turkey breast side down on a work surface. With a sturdy pair of poultry sheers, cut out the backbone of the turkey by cutting along both sides of the spine. You could possibly do this with a really sharp knife.
- Spread the turkey’s legs apart and flip it over so it’s breast side up.
- Press down firmly on the turkey’s breastbone until you hear a crack—that’s the wishbone breaking – you can also remove the wishbone by cutting it out with a paring knife. If you don’t have enough strength to firmly press down on the breastbone, use a rubber mallet or perhaps a rolling pen as I did.
- Season generously the inside and outside of the turkey with salt, garlic salt and freshly ground black pepper.
- Tuck the wings behind the breasts. Transfer the turkey to a large baking sheet covered with 18-inch heavy duty foil breast side up. Make sure the foil is long enough to fold up the edges around the bird to create a little cooking container.
- Spread the herb butter under the skin, concentrating on the breast and down into the legs, thighs and over the outside of the bird.
In the oven
- Place turkey in heated oven uncovered. After 30 minutes of roasting, baste bird and loosely tent turkey with foil.
- Cook another hour, basting at least two more times.
- Remove foil and check temperature of thickest part of breast meat. If it has reached a temperature of 155 to 160 degrees Fahrenheit, allow the bird to brown uncovered. Keep any eye on it. It may take 15 minutes or perhaps more.
- Remove from oven once you achieve the desired brownness. Loosely cover with foil and let it rest. It will remain cooking. This will take about 30 minutes.
- If it the breast meat has not reached a temperature of 155 to160 degrees Fahrenheit, cover the turkey and cook until it does, perhaps up to 30 more minutes. Then remove foil and allow to the bird to brown about 15 minutes or until you achieve the desired brownness. Remove from the oven, cover and let it rest.
When turkey is done

Spatchcock turkey hot out of the oven.
- Transfer the turkey to a cutting board after resting 30 minutes. Carefully pour pan drippings into a heat resistant cup or container. Use to make gravy or pour over plated turkey if you like.
- Carve the turkey by removing the legs and splitting the thighs from the drumsticks.
- Remove the wings from the breast.
- Split the breast into two halves, and remove the breast meat from each lobe. Slice the breast meat of each lobe into your desired thickness.
- Place turkey pieces on a large serving platter. Garnish with fresh herbs, orange slices and serve.


